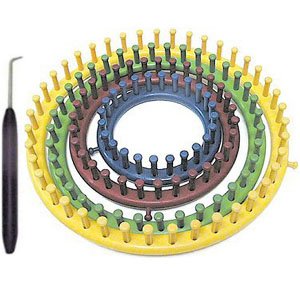
Provo Craft Tools
- Knifty Knitter X-large Round Loom (yellow)
- Knifty Knitter Pom-Pom Maker
- loom hook
- yarn needle
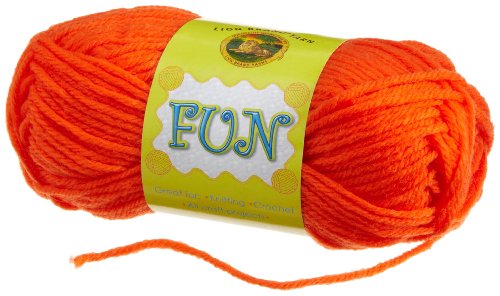
Other Supplies
- 2 skeins of Lion Brand Yarn - Color Waves (Mai Tai)
- 2 skeins of Lion Brand Yarn - Micro Spun (Mocha)
| Step 1: Hold one strand of each yarn together (treating them as one strand) to knit project. | |||
Step 2: Using the yellow long loom, e wrap every other peg until you have gone all the way around the loom. You will be knitting on these pegs for the entire project. |
|||
Step 3: Put the second row of stitches on and knit to the end. Wind the yarn back 3 stitches and knit these (this will hold the yarn so it does not come undone). Now take the turning peg loop and put it on the peg next to the end peg. Knit the bottom loop over it. This is the decrease stitch. |
|||
| Note: The pattern is knit in a slant by decreasing on one side and adding a stitch on the other side. | |||
Step 4: Wrap the rest of the row. When you have returned to the beginning end, wrap the last stitch and skip the next peg. Turn around the peg that was deleted at the first of the row. This is the increase stitch. |
|||
Step 5: Continue knitting, decreasing on the one end and increasing on the other, for 45 rows. Place a marker here on both ends. You can use knitting stitch markers or safety pins, or tie a piece of contrasting yarn. |
|||
Step 6: Knit even on the stitches for 22 rows. Put markers on both of these ends. |
|||
Step 7: Starting on row 23, knit the first 3 stitches and decrease the first stitch. Knit to the end of this row, and wrap and add onto the peg that you decreased off at the beginning of row. Continue knitting, increasing and decreasing, for 45 rows. |
|||
Step 8: Take the project from the loom by using a crochet hook and single crocheting the loops from the pegs. |
|||
Step 9: Make 6 tassels using the Pom-Pom Maker. Place the pegs in the two holes that are the farthest apart. Wrap the pegs 20 times using the Micro Spun yarn. Tie the tassel and sew to the 6 x marks on the diagram. |
|||