Instructions |
1. The main part of the knitting will be done on every other peg. This will make it very airy |
2. Wrap the first three pegs and knit 10" or 11", back and forth. |
3. Wrap the first three pegs skip the next peg and wrap around the next peg, turning back to the first 3 pegs. |
4. Knit these loops and when you wrap again skip the end peg and wrap around the next and turn, continue adding a stitch on the one side until you have 10 pegs filled. Knit these rows even for 15 rows |
5. Decrease one stitch on the right hand side, by turning on the last peg (make this last turning stitch very loose) and knit the next two stitches. |
6. Using the crochet hook take the loop from the turning peg and pull the next loop through the end one and put the remaining loop back on the same peg. Keep this very loose |
7. Knit even on the last three loops for about 10 or 11". |
What you will need. |
Provo Craft Supplies |
|
Other Supplies |
|
Saturday, April 19, 2014
Child's Hair Scarf
Scrap Mittens
Instructions |
1. Right Hand Mitten: Using the blue loom and main color of yarn (burgundy) wrap 20 of the pegs and knit flat for 17 rows or the length you may want for the wrist. |
2. Increase one stitch on each end of the knitting until the loom is full. Continue knitting in the round for 4 rows. |
3. (1) Knit 3 stitches going counter clock wise, with the main color (burgundy). Change to the thumb color of yarn (brown). (2) Start on peg #1 and wrap to the peg #9.(3) |
4. (4) Knit over pegs 4,5,6,7, of the main color of yarn (burgundy). Continue knitting on these 9 pegs for 14 or 15 rows. (5) |
5. You will have the burgundy loops on the pegs 1,2,3, and 8,9. (6)(7) Just leave them on the pegs to hold them. (8) Continue knitting on these 9 pegs until your thumb is 3.5" long or about 12 rows. Leave a 14" piece of yarn and thread through the end of the thumb loops with the color yarn that you are using (brown). (9) (10) |
6. (11) Pick up the main color yarn (burgundy) and wrap the 4 empty pegs and continue on around and knit 21 more rows. Use a 14" piece of yarn run through the loops on the top of the mitten and pull up tight. |
7. Sew up the cuff and pull up the loops on the end of the thumb and sew down the inside of the thumb and around the bottom of the thumb. |
8. Left Hand Mitten: Do the same instructions as the right hand until you get to the part of adding the thumb. |
9. You will have knit the 4 rows in the round with all of the pegs knitted on. Wrap and knit to peg #13. |
10. Change to the thumb color and wrap pegs 12 through 20. Knit over the burgundy stitches on pegs #14,15,16,17. Continue with the thumb on the 9 pegs numbers 12 thur20. |
What you will need. |
Provo Craft Supplies |
|
Other Supplies |
|
Short Shrug
Instructions |
1. Body of shrug: Using 2 strands of yarn, wrap around the peg on the outside of the loom, leaving about 3 to 4 inches of tail hanging from the tack. This is your starting point. |
2. Wrap the yarn counter clock wise around each peg, traveling in a clockwise direction; reverse on the last peg and wrap back to the first peg. Hold the loom so you are looking at the tack and the pegs are pointing upward. |
3. Now using the hook tool, pick up the bottom loop or wrap of yarn and take over the top loop. |
4. Wrap and knit until you have the length you would like for your shrug. To determine the size of the shrug, measure from your elbow, across the shoulders, and back to the elbow, for the main part of the shrug. |
5. Removing: With a crochet hook, take the first loop from the peg and crochet, using the wrapping yarn through the loop. |
6. Do a single crochet (wrap the yarn over the hook and draw the yarn through the loop on the hook) in between each of the loops on the pegs. |
7. Cut the yarn attached and pull it all the way through the loop on the crochet hook. Pull it tight for a complete knot. |
8. Cuff: Use the small loom (blue). Wrap completely around the loom and knit a circle for the cuff the length you would desire. Remove with a crochet hook the same as for the body of the shrug. You will need 2 of these. (Make sure they are the same size.) |
9. Completion: Turn your shrug wrong-side out and using your same yarn, crochet both sides together to your desired length for the arms. Leave the ends open for your cuffs. |
10. Turn the cuffs wrong side and crochet to the shrug. Seams may be pressed with steam from an iron, but DO NOT LET IRON TOUCH the shrug. Hand wash gentle. |
What you will need. |
Provo Craft Supplies |
|
Other Supplies |
|
Multi Colored Shawl
Instructions |
1. This project can be as crazy as you want to go. You could use multiple colors or stay in the same color family. I'm always a little scared to try really far out combinations, but when I do, I really get a lot of comments. |
2. Cut yarn in 3 yard pieces and arrange into the pattern of your choice. Each piece of yarn will make 2 rows of knitting. |
3. First row: Using 2 of the 36" pieces of yarn, measure 18" of yarn and wrap around the peg on the outside of the loom. Wrap the last peg on the loom and turn around and go back to the first peg. Knit this row. There should be a 18" piece left on the end for the fringe. |
4. Using the yarn of choice measure 18" and wrap around the peg on the outside and wrap the pegs. Knit and wrap back to the first peg. After the rows are started you can unwrap the yarn from the peg on the side of the loom. |
5. After you have knit several rows you can go to the starting end and tie the 4 ends in a square knot. I used 2 strands of knitting worsted and one strand of knitting worsted and one strand of fun fur to knit together. |
6. To take off of the loom cut the yarn pieces longer, measure off the 18" fringe piece and wrap and knit. When you have turned to go back, using the yarn single crochet the looms from the loom. You will need to crochet this side off very loose. Try to do both sides the same, tension. |
7. The sample is 45" long, (you can make it as long as you would like). When you have done this shawl you will have the fringe finished too. Is that not great. |
8. I made a square braid rope to hold the 2 corner together. Using 2 strands of the one main color, wrap 2 of the pegs on the loom in a figure 8 design knitting over the bottom loop when you have 2 loops on the pegs. |
9. I knit this 15" long and tied on a tassel that is 6'? long. Thread the rope part of the knitting through the front corner of the shawl and sew on the corner of the back corner side of the shawl. |
What you will need. |
Provo Craft Supplies |
|
Other Supplies |
|
Fuzzy Shrug
Instructions |
1. You will be using the yellow round loom and 2 yarns - 1 Fun Fur and 1 Sparkle. If you decide to make a different colored shrug, use a yarn that coordinates with the fun fur. |
2. E wrap the full loom with the 2 yarns, turning on the last peg and coming back to the first peg. Continue wrapping and knitting until you have 6 inches of knitting. |
3. Like doing the brim on the hats, reach inside the loom and put the stitches from the first row over the pegs to form the cuff. Knit off this row. You will also have to stitch the sides together to make the cuff. |
4. Change to the coordinating yarn and cutting the fun fur off, continue knitting until you have the desired length. Measure across your shoulders and consider that you have 3'? cuffs on the ends. |
5. When you have knitted the desired length, add your fun fur back and discontinue one of the coordinating threads. Using both of the yarns knit the cuff for this end of the shrug. (This will be the brim for the second sleeve). Take the knitting off of the loom using the crochet hook and using single crochet Take the end of your sleeve and fold it and stitch it closed with the yarn to match the first sleeve end. Wash by hand. |
What you will need. |
Provo Craft Supplies |
|
Other Supplies |
|
Halloween Patterns for the Knifty Knitter Looms

Be ready for next Halloween by whipping up some of these
cute patterns on your Knifty Knitter looms. Pumpkins and spiders are
just a couple of the knitted Halloween items that you can make on your
looms. Try a pumpkin stocking cap, or a knitted trick-or-treat bag.
Photo credit Ivy Rocks
Jack-O-Lantern Pattern For the Knifty Knitter Looms
by Clelle Gustin

Skill Level: Beginner
You will need:
* Knifty Knitter hook
* Worsted weight orange yarn
* Knifty Knitter round loom (any size)
* Polyfill
Jack-O-Lantern Knifty Knitter Pattern
Supplies for the Jack-o-lantern
Spider Pattern for the Yellow Round Knifty Knitter Loom
by Clelle Gustin

Although this pattern doesn’t specify the wrap, the e wrap or no wrap stitch work well. It’s a quick and cute pattern that would be great for Halloween.
Skill Level: Intermediate
You will need:
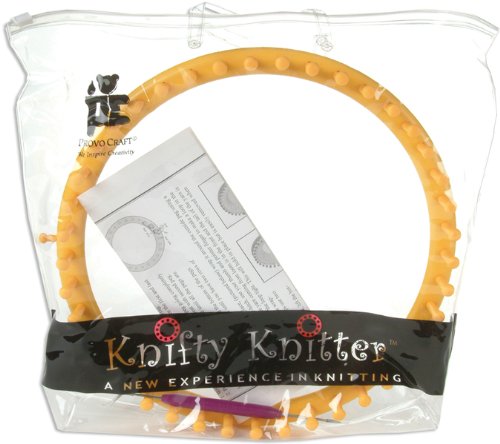
* Knifty Knitter Yellow Round Loom
* Yarn Needle
* Craft Glue
* Black Fun Fur Yarn
* Sparkle Yarn
* Red Heart Black Yarn
* Novelty Eyes
Spider Pattern for Halloween
Candy Corn Hat
For Fall or Halloween

Skill Level: Beginner
You will need:
* Knifty Knitter Green Round Loom
* Yarn Needle
* Worsted Weight or Bulky Yarn in Orange, Yellow and White
* Hook
* Stitch Markers
Candy Corn Hat
Black Spider for the Yellow Loom
Instructions |
1. Body: Knit 25 rows in the round as you would for a hat, using 2 strands of yarn (leave a long tail on the winding peg to use in sewing up the bottom of the spider body). |
2. Take the knit off the loom as you would a hat (take a 25 inch piece of yarn and thread it through top and bottom to remove from loom). Put stuffing in while still on the loom. |
3. Legs: Make 8. Using the yellow loom, knit back and forth on 8 pegs for 47 rows and leave a long piece of yarn on the winding peg to sew up the legs. Take each leg off the loom as you would a hat. Fold legs horizontally and sew up |
4. Take each leg, fold in half, then whip stitch for a fold or bend in the leg. Turn spider over and sew four legs on each side. |
5. Hot glue two large wiggly eyes on top of spider near the front. (Use the size eyes you like, spiders have small eyes, but larger eyes show up better) |
6. Note from Clella: This spider would be way cute if you used one strand of fun fur to make it hairy. Sit Samuel in the pumpkin patch of knitted pumpkins from our web-site here at Provo Craft. Have a Happy Halloween! |
What you will need. |
Provo Craft Supplies |
|
Other Supplies |
|
Subscribe to:
Posts (Atom)
Patterns You Might Like:
-
This pattern is for a dish cloth made using the smallest round loom in the set. It's a quick and easy project, perfect for the begin...
-
This elegant shawl is perfect for an evening out. Because it's made from very warm Superwash Merino wool, it will keep the chill of...
-
This pattern is for golf club covers, a unique gift for your favorite golfer. You'll be using the e-wrap and any worsted weight yarn. ...