Sunday, February 23, 2014

Ballet Style Ribbed Leg Warmers

Begin with the Red Round Loom and cast on using the ewrap.

Create ribbing by alternating knit (no wrap) and purl stitches and you knit in a circular motion continuously around the loom. Do this until the knit is approximately 3 inches.

Work approximately 70 rows of no wrap stitches.

Create 3 more inches of ribbing around the bottom of leg warmers.

Bind off by sewing through each loop to remove it from the loom. Using a crochet cast off will make the edge too tight.


How to Purl


Choosing and Using Knifty Knitter Looms


Knifty Knitter looms are typically sold in sets of four. The long looms are sold together as a set and the round looms are sold together as a set. Each set comes with the Knifty Knitter hook  and a yarn needle. While the looms are typically found in sets at department stores, they can be found for sale individually online at Amazon or Ebay. Knifty knitter looms are quickly becoming popular because they are easy for beginners or children to learn to use.

Long Looms

  • The blue long loom is 22 inches wide. Because this is the longest of all the looms, it is usually used for knitting blankets and afghans.
  • The green long loom is 18 inches wide. This loom is commonly used for making pillows and children's shawls and sweaters.
  • The yellow long loom is 14 inches wide. The yellow long loom is typically used for making children's hats and crafts.
  • The pink long loom is typically used for making crafts and is 10 inches long.
The Knifty Knitter long looms are typically used for knitting blankets, shawls and scarves. To knit flat pieces of work such as a blanket or scarf, one edge of the loom left open. It is possible to knit a hat or a tube knit project on a long loom by knitting around the loom in a circular pattern, but long looms are better suited for flat knits.The size of your finished work determines how many pegs you should knit off. Because you do not have to knit off all the pegs you can use the longest loom to knit virtually anything, because you do not have to knit off all the pegs. The smaller looms do not have enough pegs to make large pieces of work.

Round Looms

  • The yellow loom (11.5 inches wide) is for extra-large adult hats.
  • The green loom (9.5 inches wide) is for adult hats.
  • The red loom (7.5 inches wide) is for knitting children’s hats and scarves.
  • The blue loom (5.5 inches wide) is for baby’s hats, mittens, booties, socks, etc.
The round looms also come in a set of 4 looms of various sizes and lend themselves to knitting hats, socks, slippers, and mittens. The long looms can be used for knitting flat pieces of work by leaving one side of the knit open, rather than knitting circularly, but the loom shape lends itself to tube knitting.

Flower Loom

The flower loom is sold individually and is not included with any set. It is used to create flowers. It includes a Knifty Knitter Hook, a yarn needle, and instructions to knit flowers.

Knifty Knitter Spool Loom Projects


Free Patterns and Projects for the Knifty Knitter Spool Loom

Knifty Knitter Spool Loom
The first thing you should know about a spool loom is that it has 2 ends and both may be used for knitting. There is a wide end and a narrow end. Spool looms are generally used for knitting long ropes or cables. For example, the strap of a loom knitted purse is often made with the spool loom. Here are a few patterns to get you started using your Knifty Knitter spool loom, including some ideas you wouldn't expect, such as a Valentine's Day card and a scarf! 


Braided Tube Scarf Pattern

for the Knifty Knitter Spool Loom


Knifty Knitter Spool Loom ScarfThis scarf is made by knitting 5 long tubes on the spool loom and braiding them together along with some fun fur. It adds depth and dimension to the finished scarf. You can experiment by mixing and matching the knitted tubes in different colors. I've seen one done in the primary blue and yellow. It was adorable. This can be a very long project for a beginner, because it takes a while to make all the tubes.

Skill Level: Beginner

You will need:

* Knifty Knitter Pom Pom and Tassel Maker
* Knifty Knitter Spool Loom
* Knifty Knitter hook
* Yarn Needle
* 3 or 4 skeins of worsted weight yarn
* fun fur

Braided Tube Scarf for the Spool Loom
 
 This is the Knifty Knitter spool loom by Provo Craft. If you haven't seen one, you may not realize that they have 2 sides with pegs. One end is slight smaller than the other, so you can make 2 different widths of knit on the same loom. The smaller side can also be used to make the thumb of a mitten or glove.

Knifty Knitter 4-1/2 Inch X 8-1/2 Inch Spool Loom


Spool Loom Valentine

with the Knifty Knitter Spool Loom by Provo Craft

Knifty Knitter Spool Loom Valentine
The cords around the edge of this precious Valentine's day card are knitted on the Knifty Knitter spool loom. The Valentine is a creation of Brenda at the "Loom Lore" blog.

Skill Level: Beginner
You will need:
*spool loom
*several colors worsted weight yarn
*a Knifty Knitter hook
*card stock
*craft glue
Lacy Valentine Scarflet from Loom Lore


More Free Patterns for Specific Looms


Friday, February 21, 2014

Connecting Knifty Knitter Knit


Knifty Knitter Knitting Looms
Two common methods for attaching pieces of knit made on the Knifty Knitter loom are the mattress seam and the hidden seam. Mattress seams produce a neat seam that is barely visible on either side of the knit. The mattress seam works well for projects where both sides of the finished work will be seen, such as blankets. Hidden seams create an obvious seam, but the seam is turned toward the inside, such as the seam of a sweater where the arm meets the bodice.

Connecting Knifty Knitter Panels with the Mattress Seam

The mattress seam is barely visible and is a perfect seam for attaching several Knifty Knitter panels into a blanket.
  1. Place the pieces of knit to be connected on a flat surface. The side most often seen should be facing up. The panels should be laying side by side.
  2. Weave a needle through the center of the stitch on one knit and across to the center of the stitch on the attaching knit. In the center of each stitch, there is a small post, the yarn should be weaved around this post. Weave the yarn back and forth between the two panels. After you have done this approximately 5 times. Pull the yarn tighter to fully connect the panels.
  3. Work attaching the seams of the knifty knitter panels weaving, then tightening the weave, working down the seams.
  4. When the end of the seams are reached, tie a square knot and snip the yarn, weaving the excess yarn into the knit.

Connecting Knifty Knitter Knit with a Hidden Seam

The hidden seam will create a ridge and the bulk of the seam should be on the wrong side of the fabric, similar to a sleeve seam.
  1. When removing each of the knits to be attached from the Knifty Knitter loom, weave a yarn of a different color through the loops to keep them from unraveling. This yarn is temporary and it is not important that it doesn't match. In fact, choosing a contrasting color makes it easier to see and remove the yarn later.
  2. Place the right sides of the knit together and using a crochet hook feed one loop through the loop opposite it on the other knit.
  3. In an alternating pattern feed the loops through each other until the end of the row is reached.

Thursday, February 20, 2014

How to Increase Stitch or Decrease Stitch on a Loom

Knifty Knitter ScarfIncrease stitches add to the width of a finished knitting project by increasing the number of stitches in a row. Decrease stitches reduce with width of the knit by making fewer stitches in the row. In knitting, these techniques of increasing and decreasing stitches are used to change shape, such as adding arms to a sweater. Projects requiring increase and decrease stitches can be done on a Knifty Knitter knitting loom by following a few simple steps.

Increase Stitch on the Knifty Knitter Loom

Increase stitches are used to add width, or flare to any knit project.
  1. Begin the project as close to the center of the loom as possible. This leaves room on both sides of the row to increase width equally.
  2. When the end of the row is reached, rather than turning and knitting off back across the row, use the yarn to wrap an additional peg.
  3. Continue wrapping until the row has been increased by the number of stitches desired.
  4. Continue knitting off back across the row.

Decrease Stitch on the Knifty Knitter Loom

Decrease stitches may be used to taper a waste line of a sweater, or narrow the wrist of a knitted arm.
  1. When arriving at the row that is to be decreased, take the loop on the last peg of the row and unhook it. Place it on the previous peg in the row.Adding it to the previous peg, rather than simply dropping the stitch, prevents the finished knit from unraveling.
  2. Repeat the step above until all the stitches that need decreased in the row have been removed.
  3. When knitting off, knit off all the additional loops that have been placed on the end peg of the row, as one loop.
When creating increase and decrease stitches, the knit will stay symmetrical, or the same on both sides, if the same number of stitches are added or removed from each end. For example, when decreasing a row by 6 stitches, 3 stitches should be taken from each end of the row to keep the work balanced.When working with an odd number that must be increased, or decreased, for a row of knitting stitches, try to alternate the end of the row that gets the most increases or decreases. For example, if you are decreasing 5 stitches from a Knifty Knitter row take 3 from the left and 2 from the right side of the row. In the next row, if more stitches need to be decreased, and the total number of stitches removed is an odd number, take the extra stitch from the right side rather than the left.

Wednesday, February 19, 2014

How to Purl Stitch on a Knifty Knitter Loom

Purl Stitch on the Knifty Knitter
Purl Stitch on the Knifty Knitter|Heather Schulte
The purl stitch is a type of knitting stitch. In regular knitting, the purl is the opposite of a knit stitch. If a panel of fabric is knitted one side will have tightly knit "V's," the other side will have a series of short lines. The side with the "Vs" is referred to as the knit side and the side with the short tight lines is the purl side.A purl stitch can be created on a Knifty Knitter loom, just like it is on a pair of knitting needles. As in regular knitting, this stitch on a Knifty Knitter loom creates a finished knit panel that has the appearance of tightly weaved "Vs" on the knit side and a series of short straight lines on the purl side. The ability to combine the knit and purl stitch creates an unlimited number of knitting possibilities on the Knifty Knitter loom.

Making the Purl Stitch

  • Begin by tying a slip knot and securing the slip knot to the anchor peg on the Knifty Knitter Loom.
  • Ewrap the Knifty Knitter loom one time around.
  • Typically, the first loop on each peg of the Knifty Knitter loom is pushed down before knitting off the loom. This leaves room for the next loop to be placed on the peg. In the purl stitch, however, you will begin by pushing the loop to the top of the peg. The loop should be at center or higher.
  • Pull the working yarn across the front of the first peg to purl stitch. The yarn should be under the loop that is on the peg. From the top, slide the Knifty Knitter hook under the loop on the peg and snag the working yarn with the hook. Pull the working yarn up through the loop on the peg. This made a new loop.
  • Grasp the new loop between your fingers and use this to lift the old loop off the Knifty Knitter peg.
  • With your fingers, replace the old loop on the peg with the new loop you just created.

Using the Purl Stitch

The purl stitch is ideal for creating closely ribbed, tight knit. The purl stitch can be used in making hats, scarves, purses and many other projects.


Tuesday, February 18, 2014

Knifty Knitter Fingerless Glove, Arm and Hand Warmer Patterns


Fingerless Glove and Mitten Patterns for the Knifty Knitter Looms

this lens' photo
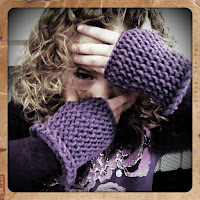
Fingerless gloves, mittens, arm warmers and hand warmers are very popular. The fingerless gloves usually have a partial finger, but are open at the end of each finger. The fingerless mittens don't have finger holes, instead they are open at the base of the fingers, but usually have a thumb hole. They are also called hand warmers, arm warmers and texting mitts. The longer variety that covers the forearm are called arm warmers.

The fingerless mittens seen in this photo are for sale at Art Fire.com


Child's FIngerless Gloves Pattern


Knifty Knitter Fingerless GlovesThis fingerless mitten pattern uses the flower loom.

Skill Level: Beginner

You will need:
* Knifty Knitter Flower Loom
* Yarn Needle
* Yarn: 2 skeins of yarn
* Knifty Knitter Hook


Knifty Knitter Fingerless Gloves Pattern


Wrist Warmers

Free Pattern for the Blue Round Knifty Knitter Loom


Knifty Knitter Wrist WarmersRowena, at the Rositchery blog calls these wrist warmers. They are pretty quick to make taking only about an hour.

Skill Level: Beginner

You will need:
* Knifty Knitter Blue Round Loom
* Yarn Needle
* Sport Weight Yarn (Used in Photo)
* Knifty Knitter Hook

Wrist Warmers Pattern


Patterns You Might Like: