Showing posts with label flower loom. Show all posts

Tuesday, April 29, 2014

Fun Fur Skinny Scarf for the Knifty Knitter Flower Loom

Loom Knit Fun Fur ScarfKnifty Knitter Fun Fur Scarf

This is a fun fur scarf pattern that can be easily loomed by a beginner. It has detailed instructions for someone new to loom knitting. It is also a skinny scarf, so it knits up quickly.

Skill: Beginner

INSTRUCTIONS

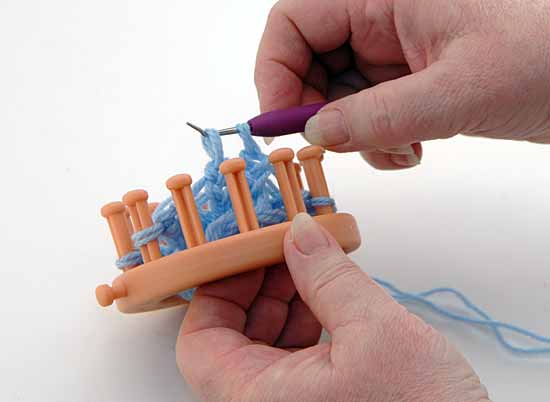
Step 1: The pegs on the Flower Loom have not been glued in. Remove every other peg from the loom. You will now have 6 pegs in the loom.


Step 2: Holding both the boucle yarn and fun fur yarn together as one, secure the yarn on the side of the loom on the anchor peg. 


Step 3: E wrap all 6 pegs.

Step 4: Wrap the pegs again and knit the bottom loops over the top loops and over the pegs, releasing the yarn to the inside of the loom. You have now completed one row of knitting.


Step 5: Continue wrapping and knitting over until your scarf reaches the desired length or until you have run out of yarn.


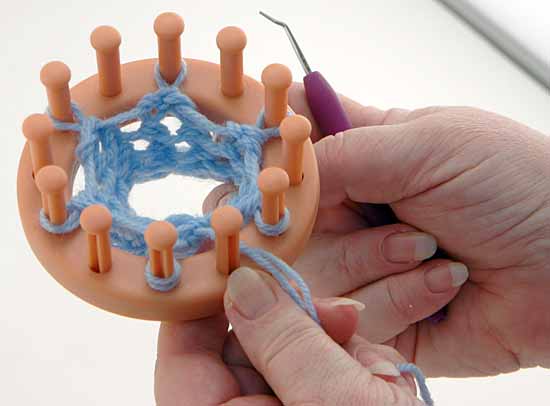
Step 6: End with about a 12” yarn tail. Thread this tail on a yarn needle and sew through each of the six loops. Pull up tight and tie off.


Step 7: Thread the starting yarn on the needle and sew up the beginning end. Tie and weave in the end.


Step 8: Beads can be sewn on the two ends for weight and decoration. (This yarn does not make good pom-poms or tassels. Decorations like beads or buttons work best.)

Note: For a furrier scarf, use 2 strands of fun fur yarn.

Provo Craft Tools

Other Supplies


Knifty Knitter Scarf- Skinny and Fun Fur

Monday, April 28, 2014

Dinosaur Hat

Round Knifty Knitter loom in the prefered size for your hat
Flower loom
Worsted weight yarn in white
Worsted weight yarn in color of choice
Poly-fil
2 black buttons

Hat
  1. Knit a basic roll brim hat following these instructions: Roll Brim Hat
  2. Rather than letting the brim roll, fold the brim up around 1 1/2 inches and use a yarn needle and thread to stitch the brim into place. Stitch from the inside of the hat, ensuring that the stitches tacking the brim into place are discreet.
Eyes
  1. Use the flower loom for each eye. Hold two white yarns together as one, begin with the draw string cast on.
  2. Knit them using the two over two stitch. 
  3. After 12 rows, change colors to the same color yarn as used for the hat. Using the same 2 over 2 stitch, knit 8 more rows.
  4. Cut the working yarn to approximately 1 10 inches.
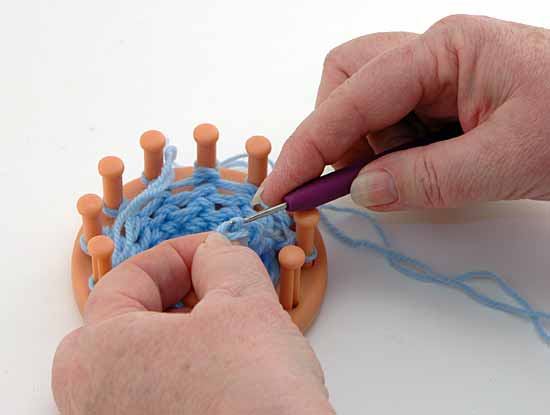
  5. Sew through each loop on the flower loom to cast off.
  6. Stuff the eye with Poly-fil.
  7. Pull the working yarn tight to close the top of the eye.
  8. Finish the eye by adding a black button.
Spikes
  1. You will be making 3 triangle shaped spikes to line up down the back of the hat. You can use the same color as the hat itself, or a contrasting color of your choice.
  2. Begin by wrapping only one. You will still be holding 2 yarns as one.
  3. Increase stitch by wrapping an extra peg on each side of the peg wrapped in the previous row.
  4. You will now have 1 peg with 2 loops on it and 2 pegs with only one loop. Knit on the peg that has 2 loops in the one over one fashion.
  5. Wrap the next row using an increase (wrap and extra peg on each side of the previous row.) Knit all the pegs that have 2 loops. 
  6. Repeat step 5 until you have knit 11 rows. 
  7. Crochet cast off.
  8. This is your first triangle. You will make 6 of them.
  9. Sew 2 of the triangles together along 2 edges by sewing through each set of loops around the perimeter. Leave one side of the triangle open. Stuff with Poly-fil. 
  10. After stuffing, sew the open edge of the triangle to the hat using a yarn needle and thread. This is your first spike. Continue until you have 3 spikes down the back of the hat in a straight line.

Baby Booty Pattern for the Knifty Knitter Flower Loom


Skill level: Beginner

Step 1: Using 12 pegs e wrap both strands around these pegs and turn and knit back and forth for 12 rows to make a flat panel of knit.

Step 2: Take the beginning stitches and put them up and over the pegs as you would if you were making a brim on a hat, knit these stitches and continue knitting for another 12 rows.

Step 3: Cut the yarn you are knitting with about 14" from the knitting. Using the yarn needle thread the end of the yarn back through the 12 loops on the pegs and pull tight for the toe.

Step 4: Tie the yarn at the toe and then sew or weave up the top or front of the bootie.

Step 5: Finish by chaining a piece of yarn about 12" long and thread through the fold on the top of the bootie. Make a pom-pom and tie on each end of the string. You could also use a piece of ribbon if you do not want to make the pom-poms.

Provo Craft Tools

  • Knifty Knitter Flower Loom (12 peg)
  • yarn hook
  • yarn needle

Other Supplies

  • 1 skein Lion Brand Jamie Classic (Peppermint Pink)
  • 1 skein Lion Brand Babysoft (Baby Print)

Saturday, April 26, 2014

Baby Mitts for the Knifty Knitter Flower Loom

Knifty Knitter Baby Mitts
Knifty Knitter Baby Booties and Mitts Pattern

Skill level: Beginner

Step 1: Using one strand of the blue yarn and one strand of the white yarn (holding them together as if they were one strand), wrap the 12 pegs according to the method shown in the Round Loom instructions.

Step 2: Wrap and “knit off” five rows of knitting, using the hook as shown in the Round Loom instructions.
Step 3a: Using the crochet hook, take the loop from the 1st peg and then from the 2nd peg. Knifty Knitter Baby Mitt Instructions
Step 3b: Pull the 2nd loop through the 1st loop and place the loop back on the 2nd peg.
Step 3c: Take the loop from the 3rd peg and then from the 4th peg. Pull the 4th loop through the 3rd loop and place the loop back on the 4th peg.
Step 3d: Continue in this manner until you have taken the 12th loop through the 11th loop and placed the loop on the 12th peg. You will now have 6 loops on the loom.
Step 4: Wrap the loom 2 more times. Now some pegs will have 3 loops and others will have 2 loops. For the pegs that have 3 loops on them, knit the bottom 2 loops over the top loop. For the pegs that have 2 loops on them, knit the bottom loop over the top one, just like normal. When you are finished, there will only be one loop on each peg.

Step 5: Wrap and knit off 9 more rows. Thread the blue yarn needle with one strand of yarn, and sew the yarn through the loops on the pegs (pulling the loops off the pegs as you go). When you have sewn through all the pegs, pull the two ends of the yarn to gather the material and tie them in a tight square knot. (This is the same method you would use to finish a hat on the Round Loom.)

Repeat Steps 1 – 5 to make a mitt for the other hand.

Step 6: You can string a ribbon through the holes in the top of the mitts or, using one strand of yarn, make an I Cord (see directions below) and put a pom-pom on each end to string through the holes.
  • I Cord: Using any 2 pegs on any of the looms, wrap 2 loops on each peg in a figure 8 design. Take the bottom loop over the top loop and over the peg. Continue wrapping in the figure 8 and knitting over. This will form your I Cord.

SUPPLIES

Provo Craft Tools

  • Knifty Knitter Flower Loom
  • hook
  • blue yarn needle

Other Supplies

  • 1 skein of blue baby yarn
  • 1 skein of white baby yarn

Go to the Pattern for the Booties

Monday, April 21, 2014

Baby Booties


Knifty Knitter Baby Booties
Instructions
1. Using 12 pegs e wrap both strands around these pegs and turn and knit back and forth for 12 rows.
2. Take the beginning stitches and put them up and over the pegs as you would if you were making a brim on a hat, knit these stitches and continue knitting for another 12 rows.
3. Cut the yarn you are knitting with about 14" from the knitting. Using the yarn needle thread the end of the yarn back through the 12 loops on the pegs and pull tight for the toe.
4. Tie the yarn at the toe and then sew or weave up the top or front of the bootie.
5. Finish by chaining a piece of yarn about 12"long and thread through the fold on the top of the bootie. Make a pom-pom and tie on each end of the string. You could also use a piece of ribbon if you do not want to make the pom-poms.
What you will need.
Provo Craft Supplies
  • Knifty Knitter Flower loom (12 peg) and pick
  • Using one strand of each Lion Brand Jamie Classic (Peppermint Pink) and Lion Brand Babysoft (Baby Print).

Friday, April 18, 2014

Cell Phone Cover

Cell Phone Tote
Instructions:

To make the bag:
1. Using Flower Loom, e-wrap (wrapping loops on pegs that look like series of lowercase es) 6 pegs and knit back and forth to make flap on pouch. Make it about 3" to 4" long (or desired length).
2. Continue around loom using all pegs and continue knitting rows, until bag measures around 4". Note: Depending on the type of yarn you choose to use, these 4" may be different number of rows.

To make the handle:
1. Using Knifty Knitter Spool Loom, drop yarn down through middle of loom. Wrap 2 rows on small end of loom and knit off (pulling bottom loop over top loop and peg).
2. Knit 28 rows (or desired length). Sew handles to side of pouch or attach to top of bag.
3. Add beads, buttons, sequins, or whatever you would like to embellish tote.
What you will need.
Provo Craft Supplies
  • Knifty Knitter® Flower Loom
  • Knifty Knitter Spool Loom
  • Knifty Knitter hook
Other Supplies
  • Crochet hook
  • Yarn needle
  • Bits and pieces of yarn

Patterns You Might Like: