Sunday, April 27, 2014
Hourglass Scarf for the Knifty Knitter Blue Round Loom
Skill level: Intermediate
| This scarf is wide on the ends and narrow in the middle of the neck — like an hourglass shape—so that it fits the neck better. |
Step 1: Using one strand of each of the yarns, e wrap all the pegs on the loom. |
Step 2: Turn around on peg 24 and knit back. Knit back and forth for 8". This makes a flat panel piece, instead of a circular piece like a hat. |
Step 3: Decrease one loop on the beginning of the next 2 rows, as follows: put the loop from the first peg on the hook and then put the loop from the second peg on the hook. Pull the second loop through the first loop and place the loop on the second peg. Now you will be knitting on 22 pegs instead of 24. Knit on these 22 pegs for 4". |
Step 4: Decrease 1 loop on the beginning of the next 2 rows. Knit 4" on these 20 pegs. |
Step 5: Continue this method, decreasing and knitting for 4", until you are only knitting on 12 pegs. Knit for 12". (This will be the more narrow neck section.) |
Step 6: Increase, or add, one stitch on each end of the next 2 rows and knit 4". (To increase, simply wrap an extra peg on each end.) Increasing stitches creates the wider part of the scarf. |
Step 7: Repeat this (increasing and wrapping 4") until you are knitting on all the pegs. |
Step 8: Knit until you are 8" from the last increase. |
Step 9: Use a crochet hook to remove the loops from the loom. Take the first loop from the loom and chain through. Take the next loop off and chain through both of the loops. Continue until all loops are taken from the loom. Do the crochet stitches very loosely. Pull the end of the yarn through the last loop and pull tight. (You may want to crochet a chain stitch at the beginning of the scarf to make the ends the same width.) |
This yarn covers up the stitches. To be able to see the adding of stitches, use knitting markers or safety pins to show increases and decreases. Provo Craft Tools
Other Supplies
|
Saturday, April 26, 2014
Knifty Knitter Fingerless Gloves
Provo Craft Tools
Other Supplies
Step 1: Left Hand: Using 2 strands of Wool-Ease yarn, e wrap counterclockwise to peg 19. Turn around on peg 19 and knit back to peg 1. Complete 12 rows. |
Step 2: Thumb: After you have knitted back to peg 1, wrap pegs 24, 23, 22, 21, and 20. This will be the top of the thumb. Knit back to peg 19. Then turn and knit the other way to peg 20. Decrease the loop on peg 20, and continue decreasing one loop on the thumb side (5 times) until you are back on the original 19 pegs. |
Step 3: Knit 2 more rows on the 19 pegs. |
Step 4: Cut one of the yarns and add in the Color Wave yarn. Knit 3 rows and take them off of the loom, very loosely. |
Step 5: Sew the side of the glove up using the yarn needle and the Wool-Ease yarn. Leave a hole for the thumb. |
Step 6: Right hand: start on peg 24 and wrap clockwise to peg 6. Complete 12 rows of knitting. |
Step 7: Thumb: When you have knit back to peg 24, knit on pegs 1, 2, 3, 4, and 5. Decrease the loop on peg 5, and continue decreasing every row on the thumb side (5 times) until you are back on the original 19 pegs. |
Step 8: Using the yarn needle and one strand of yarn, sew up the side of the glove, leaving the hole for the thumb. |
Step 9: Make one stitch in the middle of the end where the fingers come out. The stitch will go in between the four fingers on your hand. (I used a needle with regular sewing thread to tack this space between the fingers.) |
Baby Mitts for the Knifty Knitter Flower Loom
 |
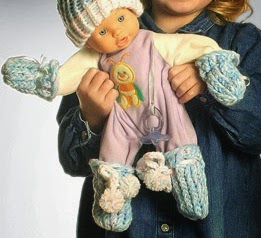
| Knifty Knitter Baby Booties and Mitts Pattern |
Skill level: Beginner
| Step 1: Using one strand of the blue yarn and one strand of the white yarn (holding them together as if they were one strand), wrap the 12 pegs according to the method shown in the Round Loom instructions. | |
Step 2: Wrap and “knit off” five rows of knitting, using the hook as shown in the Round Loom instructions. |
|
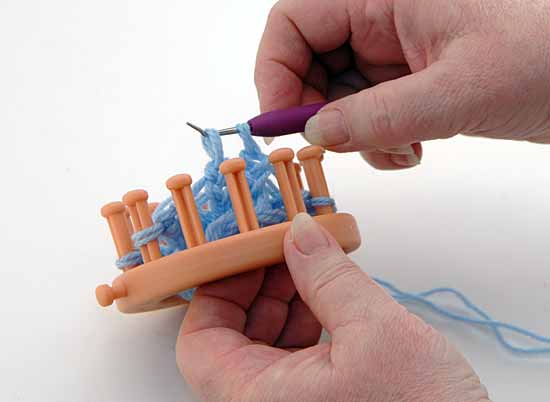
| Step 3a: Using the crochet hook, take the loop from the 1st peg and then from the 2nd peg. |  |
| Step 3b: Pull the 2nd loop through the 1st loop and place the loop back on the 2nd peg. |  |
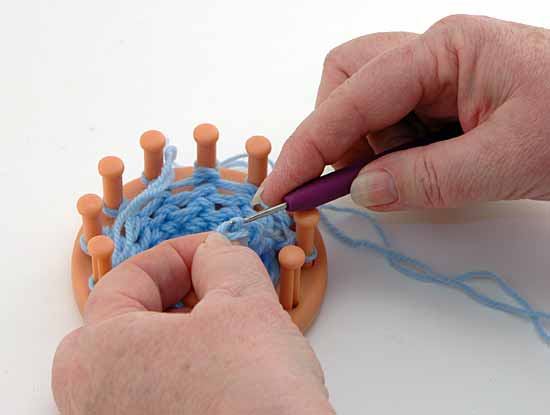
| Step 3c: Take the loop from the 3rd peg and then from the 4th peg. Pull the 4th loop through the 3rd loop and place the loop back on the 4th peg. |  |
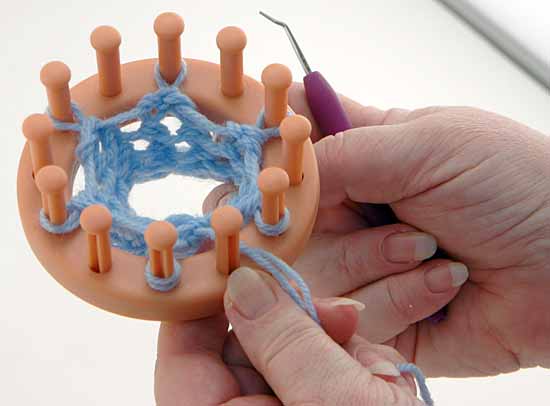
| Step 3d: Continue in this manner until you have taken the 12th loop through the 11th loop and placed the loop on the 12th peg. You will now have 6 loops on the loom. |  |
| Step 4: Wrap the loom 2 more times. Now some pegs will have 3 loops and others will have 2 loops. For the pegs that have 3 loops on them, knit the bottom 2 loops over the top loop. For the pegs that have 2 loops on them, knit the bottom loop over the top one, just like normal. When you are finished, there will only be one loop on each peg. |  |
Step 5: Wrap and knit off 9 more rows. Thread the blue yarn needle with one strand of yarn, and sew the yarn through the loops on the pegs (pulling the loops off the pegs as you go). When you have sewn through all the pegs, pull the two ends of the yarn to gather the material and tie them in a tight square knot. (This is the same method you would use to finish a hat on the Round Loom.) Repeat Steps 1 – 5 to make a mitt for the other hand. |
|
Step 6: You can string a ribbon through the holes in the top of the mitts or, using one strand of yarn, make an I Cord (see directions below) and put a pom-pom on each end to string through the holes.
SUPPLIESProvo Craft Tools
Other Supplies
Go to the Pattern for the Booties | |
Knifty Knitter Poncho with Collar
The original pattern is by Clella Gustin and published by Provo Craft.
SUPPLIES
Provo Craft Tools
- Long Blue Loom
- Knifty Knitter Extra large Round Loom (yellow)
- hook
- yarn needle
Other Supplies
- crochet hook size I
- 4 skeins of Lion Brand Wool-Ease thick and quick large (if you want your poncho longer, add 2 stitches per 1" of extra length you want)
Skill level: Beginner
| Step 1: Cast on, or e wrap, 42 pegs on the blue loom. |
Step 2: Knit 2 panels that are 33" long (they will be 20" wide). This is equivalent to about 110 rows in each panel. |
Step 3: Sew panels together as shown in diagram. Leave about 22 loops on each side of both panels for the neck. Slip the knitting through the center of the yellow loom, and slip the stitches on the pegs to the yellow loom. Knit 9 rows. |
Step 4: Using a crochet hook, do a single crochet around the outside edge and around the neck piece.
Here is the poncho knitted by Jeannette Miles using Bernat Softee Chunky yarn, which is weight 5. Isn't it gorgeous!
|
Subscribe to:
Comments (Atom)
Patterns You Might Like:
-
This pattern is for a dish cloth made using the smallest round loom in the set. It's a quick and easy project, perfect for the begin...
-
Instructions 1. You will be making a regular hat just like the instructions that came with the looms. 2. Using one strand of t...
-
This pattern makes a large Christmas stocking to hold plenty of toys from Santa. What you will need: Red Round Knifty Knitter Loom ...


