Showing posts with label baby yarn. Show all posts

Saturday, April 26, 2014

Baby Mitts for the Knifty Knitter Flower Loom

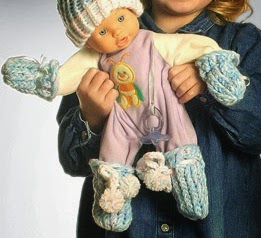
Knifty Knitter Baby Mitts
Knifty Knitter Baby Booties and Mitts Pattern

Skill level: Beginner

Step 1: Using one strand of the blue yarn and one strand of the white yarn (holding them together as if they were one strand), wrap the 12 pegs according to the method shown in the Round Loom instructions.

Step 2: Wrap and “knit off” five rows of knitting, using the hook as shown in the Round Loom instructions.
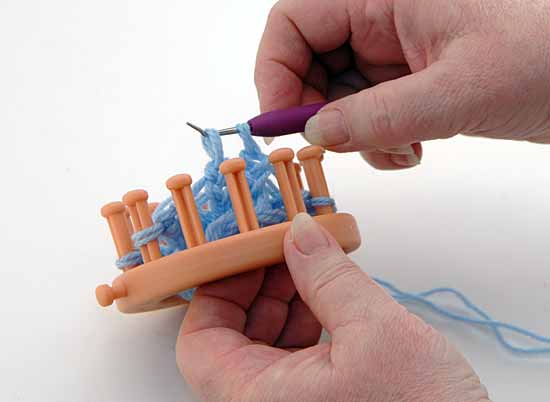
Step 3a: Using the crochet hook, take the loop from the 1st peg and then from the 2nd peg. Knifty Knitter Baby Mitt Instructions
Step 3b: Pull the 2nd loop through the 1st loop and place the loop back on the 2nd peg.
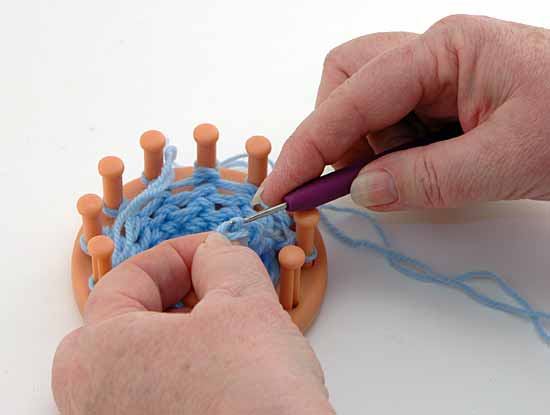
Step 3c: Take the loop from the 3rd peg and then from the 4th peg. Pull the 4th loop through the 3rd loop and place the loop back on the 4th peg.
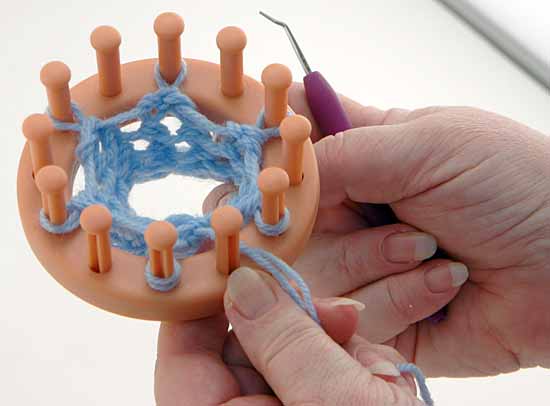
Step 3d: Continue in this manner until you have taken the 12th loop through the 11th loop and placed the loop on the 12th peg. You will now have 6 loops on the loom.
Step 4: Wrap the loom 2 more times. Now some pegs will have 3 loops and others will have 2 loops. For the pegs that have 3 loops on them, knit the bottom 2 loops over the top loop. For the pegs that have 2 loops on them, knit the bottom loop over the top one, just like normal. When you are finished, there will only be one loop on each peg.

Step 5: Wrap and knit off 9 more rows. Thread the blue yarn needle with one strand of yarn, and sew the yarn through the loops on the pegs (pulling the loops off the pegs as you go). When you have sewn through all the pegs, pull the two ends of the yarn to gather the material and tie them in a tight square knot. (This is the same method you would use to finish a hat on the Round Loom.)

Repeat Steps 1 – 5 to make a mitt for the other hand.

Step 6: You can string a ribbon through the holes in the top of the mitts or, using one strand of yarn, make an I Cord (see directions below) and put a pom-pom on each end to string through the holes.
  • I Cord: Using any 2 pegs on any of the looms, wrap 2 loops on each peg in a figure 8 design. Take the bottom loop over the top loop and over the peg. Continue wrapping in the figure 8 and knitting over. This will form your I Cord.

SUPPLIES

Provo Craft Tools

  • Knifty Knitter Flower Loom
  • hook
  • blue yarn needle

Other Supplies

  • 1 skein of blue baby yarn
  • 1 skein of white baby yarn

Go to the Pattern for the Booties

Friday, April 25, 2014

Receiving Blanket for an Infant

Infant Receiving Blanket for Blue Knifty Knitter Loom
Skill level: Beginner
Dimensions: measures 27" x 27" including shell stitch

Step 1: Using one strand of yarn, secure yarn to anchor peg of loom. E wrap up one side of loom, around end, and down other side. Turn on last peg and wrap going opposite direction. When you have two rows wrapped on the loom, knit by pulling the bottom loop over top loop.

Step 2: Continue wrapping and knitting for 100 rows to make square. To stabilize this loose weave, do single crochet around entire shawl. Crochet 2 single crochet stitches in between each row and 2 single crochet stitches in between each knitted end. Finish with simple shell stitch around single stitch.

Step 3: Create border around shawl. To create the stitch on the sample, chain 3 dc* in same stitch. Skip 2 stitches and dc 4 times in next stitch. Continue around shawl, skipping 2 stitches and doing 2 dc in first row and skipping 2 stitches and doing 4 dc in next stitch. For next row, do dc's in middle of shells.

Note: *dc = double crochet SUPPLIES Provo Craft Tools Knifty Knitter Long Loom – Blue Knifty Knitter hook Other Supplies Crochet hook: size H 2 skeins of baby yarn of your choice

SUPPLIES

Provo Craft Tools

Other Supplies

  • Crochet hook: size H
  • 2 skeins of baby yarn of your choice

Monday, April 21, 2014

Baby Booties


Knifty Knitter Baby Booties
Instructions
1. Using 12 pegs e wrap both strands around these pegs and turn and knit back and forth for 12 rows.
2. Take the beginning stitches and put them up and over the pegs as you would if you were making a brim on a hat, knit these stitches and continue knitting for another 12 rows.
3. Cut the yarn you are knitting with about 14" from the knitting. Using the yarn needle thread the end of the yarn back through the 12 loops on the pegs and pull tight for the toe.
4. Tie the yarn at the toe and then sew or weave up the top or front of the bootie.
5. Finish by chaining a piece of yarn about 12"long and thread through the fold on the top of the bootie. Make a pom-pom and tie on each end of the string. You could also use a piece of ribbon if you do not want to make the pom-poms.
What you will need.
Provo Craft Supplies
  • Knifty Knitter Flower loom (12 peg) and pick
  • Using one strand of each Lion Brand Jamie Classic (Peppermint Pink) and Lion Brand Babysoft (Baby Print).

Patterns You Might Like: